The Pencil Artist’s view of Negative Space

Jay emailed me to say that at recent art show:

One artist commented that drawing is vastly different than painting. If I was being judged by brush wielders they might see my work as incomplete. Pencil artists see white or negative space differently. These differences in perception influence lighting. Trying to apply painting criteria to drawing breaks down over issues of negative space.

I totally agree. You can perhaps best compare drawing to watercolour painting, since both have only the white of the paper available. In my workshops and online I try my hardest to get the artists to see the negative space positively. Two pencil strokes can leave a very usable white shape between them, and we pencil artists need to be constantly aware of the white spaces we are creating. I often find those spaces suggest something that I wouldn’t perhaps have consciously thought of, yet the space works well – especially when refined to become a specific positive element.

Jay continued:

I remember your lesson about negative space, focused on drawing grass. I’m trying to work through how to apply this lesson to contrasts between different foreground/background values like the shell of a terrapin and a stick he is under from a bush nearby. Shadows help with separation. At the same time, exaggerating the value differences between the stick and the light grey of the shell creates an artificial contrast making for greater separation of objects.

Your thinking is 100% accurate. Never be afraid of exaggeration. I do it all the time. False atmospheric perspective, for example, that exaggerates depth. I see drawing as a collection of visual clues that we supply to our viewers. If a little subtle exaggeration is required to add clarity to the clues, then I’ll apply it. We don’t have colour – we can’t add blue to create recession – so I use diminishing detail, softening edges, and lighter values that are often lighter than would naturally occur. Ultimately, all that matters is that the drawing is “read” correctly.

Here are two examples within one drawing “Early Morn at Witton Marsh”.
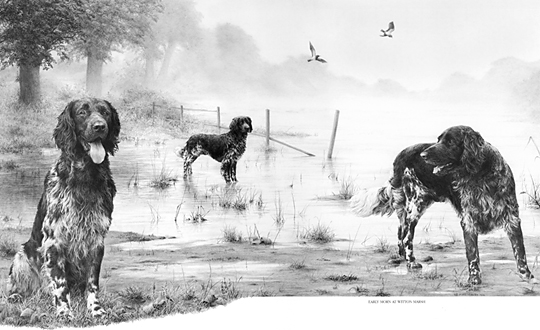
Early Morn at Witton Marsh by Mike Sibley
Early Morn at Witton Marsh

The atmospheric perspective has been stretched to create more recession, and the two birds are deliberately placed to enhance the gap between background and midground – contrasting their relative sharpness against the soft, misty trees and sky.
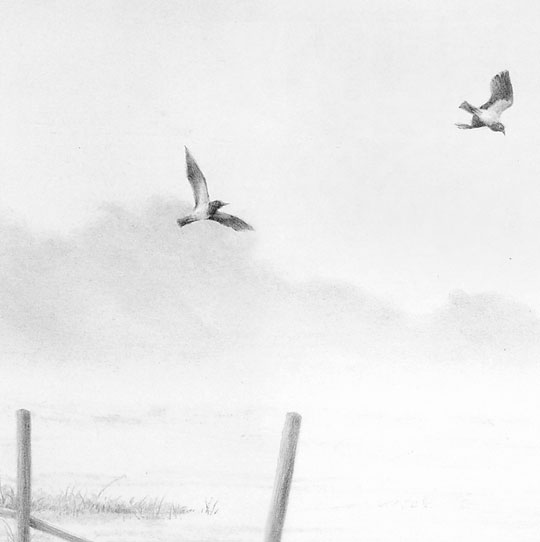
Detail from Early Morn at Witton Marsh by Mike Sibley

Lower down, the central dog is larger than it should be. It was sized for balance and presence rather than natural accuracy. To overcome that, the fence behind it has a false perspective – it recedes more quickly than it should. But it provides scale alongside the dog and then seamlessly connects that to the scale of the brush and trees behind it.
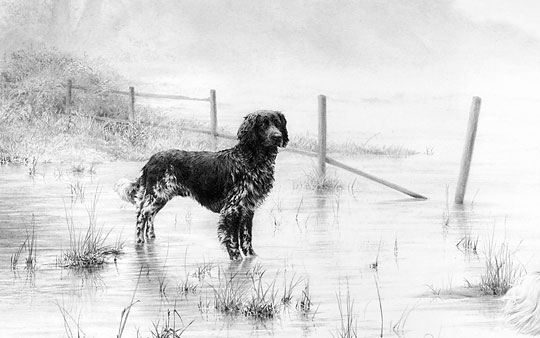
Detail from Early Morn at Witton Marsh by Mike Sibley

And to return to Jay’s original point, all the hair depends entirely on negative drawing – all white hair is purely negative space. The adjacent drawing defines the edge
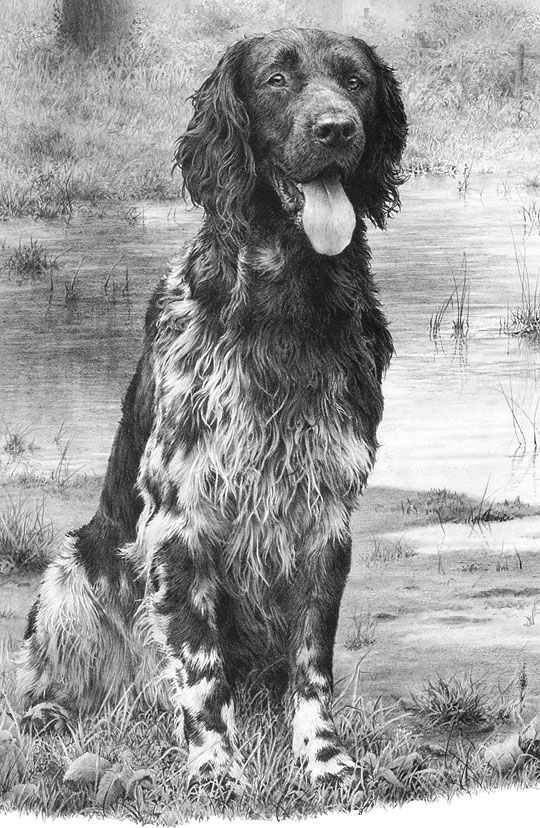
Early Morn at Witton Marsh by Mike Sibley
detail – “Early Morn at Witton Marsh” by Mike Sibley

You can read the story behind this drawing at
https://sibleyfineart.com/gallery_LE.htm?mnst&171–munsterlander

Thanks for your question, Jay.

INDENTING EXPLAINED

I recently received yet another query about the technique of indenting. After answering the query I began to write “see my tutorial at SibleyFineArt.com for…” and then realised that after all these years… I have never written it.

So, based on Week 5 of my 8-week Beginners course at www.Drawspace.com, I’ve finally remedied the situation.

Almost all erasing techniques suffer from a few problems, such as the inability to create pure whites. An erased area will never match the brilliance of an untouched one, and an erased line, however carefully carried out, will never possess a truly sharp edge. And removing graphite from paper often flattens the surface texture, which results in less tooth for succeeding applications of graphite to adhere to. So let me introduce you to a saviour — although not one for the timid, this method produces white marks with clean, sharp edges, and it protects the white of your paper.

Indenting – impressing grooves into your paper that later drawing skips over and leaves as pristine white lines – is an excellent method for creating whiskers, stitches and other accurate parallel-sided lines that suffers none of the faults of an eraser.

Read more at INDENTING EXPLAINED — now online and available.

A Query on Size and Fading

Deidre emailed to ask:

I have just bought you book “Drawing from Line to Life“, and I’m really enjoying it. I was wondering if I could ask you a few questions? When you start out on any drawing, what is the most common pencil you use for the initial outline?

Lightly applied 2B, because I can erase it completely without leaving any indentations.

What is the largest size of drawing that you do? My current drawing is 14″ x 11″. I am enjoying it, but sometimes I wish it wasn’t so big. Do you think it is better to have a larger drawing or smaller?

I think my largest is around 17″ x 12″ and the head studies in print were about 8″ x 12″ – whatever size best suits the subject. With experience, you can more easily judge the size above which detail becomes unrealistic. I’ve also found that increasing the size by 20% almost doubles the work involved due to the extra detail required.

Personally, I’ve learned to not let size, and the time required, bother me. I just begin in the top left corner and work outwards. I split every drawing into one hour chunks as I’m working and ignore the unfinished portion, so I get to “complete” many small drawings rather than agonise over the time I need to complete the entire drawing.

On your head portraits of people or animals, why do you prefer not to put a shaded edge around the drawing like you see commonly from other artists?

It’s called a vignette, and I don’t like them because it’s unnatural and looks unrealistic. This is especially true if you’ve faded the drawing at the base of the neck – it really needs to just fade out at that point, but a vignette outlines it and ruins the implied continuance of the animal.

I think many artists use a vignette because it helps to increase the contrast within the drawing – this is especially true of a white animal – but there are other ways of handling that. I use what I call “edge shadows” – using the shadows beneath the hairs around the extremity to provide a clear visual boundary. Don’t worry about the overall lighting direction, you can lie quite convincingly and place shadows wherever you need them. The viewer just assumes there’s a reflective surface outside of the picture that is bouncing reflected light back into the drawing.

If you have to resort to outline, create a “lost and found” edge where the line alternately appears and disappears – sufficient line to tell the eye that it’s an edge but not so much that it looks like a line.

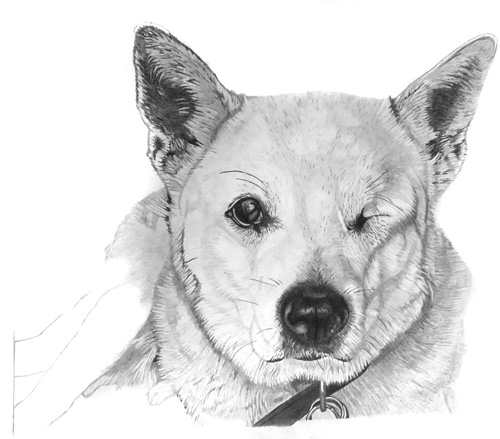
Deidre's unfinished drawing

I can clearly understand the edge of your dog and I don’t see any need to make it any clearer. The golden rule (for the inclusion of anything) is “If it doesn’t add to the understanding, don’t include it.” Subtlety is more natural than making something obvious. In your case, the ears are clearly defined, the head sufficiently so, and the neck doesn’t need its extremities defined, as it’s a secondary element. Personally, I’d terminate the collar half way down the rings, extend the drawing down an inch or so and use that extension to gently fade the rings and the bottom edge to white.

I can see guidelines on the left-hand side (its back legs?) that leads me to believe you intend to extend the drawing in that direction. Will that area add anything to our understanding of the dog? If those are its back legs, it will tell us that the dog is laying down, but is it necessary for us to know that? Will it helps us to better understand the head (the focus of the drawing)? Will we be distracted by wondering where the front feet are?

I’d just curve that side round to meet the collar and let it fade away to the left. That area is only required to put the head into context – and you don’t want to pull attention away from it.

The bottom of the collar of my dog, is just above the bottom of the paper, so I don’t have room to extend it down.

Golden Rule #1: Your paper should always be larger than your intended drawing! You can trim the excess paper off later but you can’t add it – as you found out. 🙂