New Studio update

By now you must be thinking “No progress? Has Mike grown tired of it already?” Well, no. George the builder completed the shell and interior room dividers while I was running workshops in Oregon, California and Colorado – but there still remains much to do.
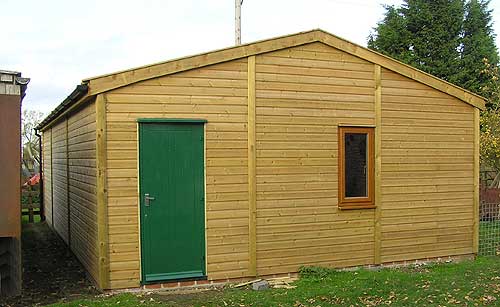
Exterior view
Completed building and new door
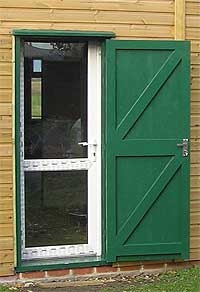
Security and storeroom doors

My first job was to fit the exterior door frame and security door outside of the inset glazed storeroom door, and paint it green. That accomplished, the plywood interior skin, ceilings and walls needed preparation and papering. In the meantime, the white protective tape has been removed from the brown window frames, which are white only on the inside.

The ceilings are being papered with heavy-duty liner paper to be emulsion painted later. This is the first time I’ve papered a ceiling, and I’m quite pleased with the result – but you’d better keep out of hearing range if you see me wrestling with the manic paper! The walls of the storeroom will also be painted, but the office and studio walls will be papered because, hopefully, that should give no indication of the surface behind it – and it should give us a much better working environment.
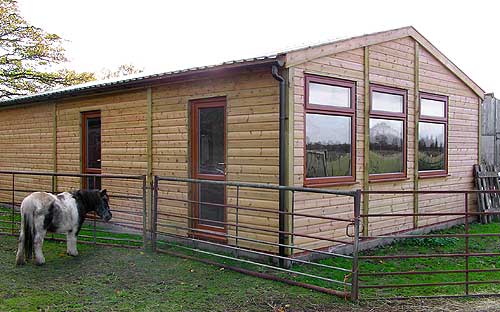
North east view with tape removed from window frames

The building itself, which currently has no form of heating, is proving to be well insulated – for both heat and sound. Even rain on the steel profile roof is only just audible.

At present I’m spending most afternoons working in the studio. In the evening, when required, I’m at DrawSpace.com, critiquing the work of artists attending my Novice correspondence course. And bringing my accounts up to date in between 🙂

Tomorrow, Sunday, I will have completed the papering of both the office and storeroom, completed the painting of the storeroom’s walls and maybe gloss painting the door frames.
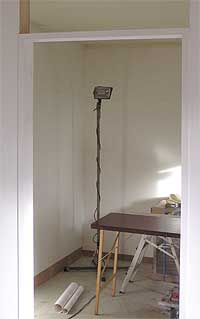
Looking into office from storeroom

I’m able to do this because I’ve run a temporary power lead into the building for a light – usually used in my workshop when I’m welding. So the next project will be the installation of the permanent wiring for lighting, followed by the wiring for the power sockets and heating.

I’m undecided about heating. We sited the LPG gas tank near the studio so we could link up to it for central heating, but now I’m favouring an HVAC system. This combines Heating, Ventilation and Air Conditioning with a dehumidifying bonus. Two units should be sufficient, and that’s why I’ve omitted the wall panel above the office door – to allow heat to flow to both rooms from one unit.

I know watching me do this is like watching paint dry – literally! – so expect a welcome break before I post the next update. 🙂

Drawing Skies

Gary posed another question:

Can you offer any advice on how you tackle skies? Skies can sometimes make or break a drawing, especially if you want the focus to be on the scene but need to add some degree of the sky as well – be it understated. Would you apply a cross-hatched technique here and if so, is there a particular method that works well for blending and creating a natural looking sky?

Skies are more important than I once realised! I used to leave the areas white but I soon discovered that adding even a light tone to skies immediately increased the brilliance of highlights within the drawing. In other words, removing all white from a drawing, except where they are intended, forces the viewer’s eye to read highlights as pure, brilliant white.

Applying an overall, smooth tone to skies can present technical problems; there should be a total absence of line and smoothly graduated changes of value. Any marks that don’t conform to Nature immediately reduce your carefully rendered realism to mere “drawing”.

I almost always hold my pencil in a normal “writing” position, but for skies, and other large areas of light tone, I use an underhand grip.

Underhand shading hold

Here I use only the weight of my clutch pencil to apply the tone, and usually with a 2H pencil. Of course, I cannot shade a large area from side to side with a single set of lines, and shading the area in sections leads to two potential problems. First, stopping a line to shade back in the other direction leaves blunt ends. And an overlap of blunt ends when shading adjacent areas will result in a very obvious double layer of graphite.

Banding caused by overlapping blunt ends

Over the years I’ve developed a technique to overcome both faults. Try this: practice drawing a line that drops gently onto the paper, continues with the required weight and then is as gently lifted clear. This will produce a line with tapers at both ends. Think of it as drawing an arc – a swing down onto the paper followed by a swing up from it. You can extend such a line at will with no evidence of a join, as a taper over a taper is simply a full strength line.

Feathered ends overlap seamlessly

Once you get a feeling for drawing this way you can begin to shade large areas – with a taper at the end of each line, which you should also stagger to prevent the eye detecting an edge. Each shaded area will now have a feathered edge that you can overlap with adjacent areas – a feathered edge layered over a feathered equates to a solid, matching tone.

Once the area is completely shaded you will need to blend it. Incidentally, blending is a technique I rarely use, except for skies or skin tones. Knowing beforehand that you intend to blend, you can make allowances for this when applying your graphite. That’s why I use the pencil-weight, underhand method, because the graphite sits on the top of the paper and not deep in the tooth. I usually blend very lightly with tissue wrapped around my finger. As the tooth of the paper is still available, I can apply additional layers, if required, to build up the tone.

I don’t customarily produce dark skies or include more than a hint of clouds. For good advice on drawing those I can recommend Diane Wright’s “Drawing Skies” tutorial.

I describe the techniques I’ve mentioned here in much more detail in chapter four of my book “Drawing from Line to Life”.

Tracing and other Transfer Methods

Gary wrote to ask:

Is tracing the outline of a sketch and drawing round this onto a chosen paper a good way to transfer the image? Is there a particular grade of pencil that works best?

I’m assuming you are referring to the technique of scribbling on the back of the tracing and then drawing over the traced lines to transfer the loose graphite to your paper? If that is so, then there are a couple of variations that might work for you.

First, make yourself a sheet of graphite “carbon” paper by heavily coating one side of a sheet of Mylar or tracing paper with a 6B pencil. Lightly tape the top edge of your tracing to your drawing paper so it cannot move. Slide the “carbon” paper between the two and proceed to draw around your traced lines – experience will tell you how hard to press. This will lightly transfer the 6B to your drawing paper and, unless you’ve used too much pressure, the lines will not be indented into the surface. You need to avoid that fault at all cost, because indented lines (particularly those drawn in error) will remain visible in your completed drawing.

The advantage of using this transfer method is that you can re-use the tracing at any time and, as it is hinged to your drawing paper, you can overlay it onto your drawing to check for accuracy or to redraw any lines at any stage of the drawing process.

I no longer use this system but when I did I found 6B to be the best choice, because it will erase completely. If you trace from a projection or use any other method of drawing your guidelines directly onto your paper, I recommend the use of lightly applied 2B, which produces sharper edges than 6B and is also fully erasable.

What is the best way to achieve this without getting unwanted dark lines which can be a nuisance if you want areas to be very light in tone on the actual drawing?

Whatever method I use I always use Blu-Tack to fade the guidelines in the area that I am about to work in. You could also use a kneadable eraser or another make of wall putty. Don’t rub the lines, simply roll Blu-Tack over them to gently lighten them until just a faint shadow remains.

Aside from a projector or light box which can be expensive, is there a better way to transfer the image without leaving unwanted lines or marks?

It’s as good a method as many and better than most. How you transfer your guidelines to your drawing surface is immaterial – all that really matters is that they are lightly applied, to prevent indentations, and can be faded or completely removed. They are just guidelines and should be reworked, adapter or even discarded as you work, so the facility of complete removal is essential.