The Pencil Artist’s view of Negative Space

Jay emailed me to say that at recent art show:

One artist commented that drawing is vastly different than painting. If I was being judged by brush wielders they might see my work as incomplete. Pencil artists see white or negative space differently. These differences in perception influence lighting. Trying to apply painting criteria to drawing breaks down over issues of negative space.

I totally agree. You can perhaps best compare drawing to watercolour painting, since both have only the white of the paper available. In my workshops and online I try my hardest to get the artists to see the negative space positively. Two pencil strokes can leave a very usable white shape between them, and we pencil artists need to be constantly aware of the white spaces we are creating. I often find those spaces suggest something that I wouldn’t perhaps have consciously thought of, yet the space works well – especially when refined to become a specific positive element.

Jay continued:

I remember your lesson about negative space, focused on drawing grass. I’m trying to work through how to apply this lesson to contrasts between different foreground/background values like the shell of a terrapin and a stick he is under from a bush nearby. Shadows help with separation. At the same time, exaggerating the value differences between the stick and the light grey of the shell creates an artificial contrast making for greater separation of objects.

Your thinking is 100% accurate. Never be afraid of exaggeration. I do it all the time. False atmospheric perspective, for example, that exaggerates depth. I see drawing as a collection of visual clues that we supply to our viewers. If a little subtle exaggeration is required to add clarity to the clues, then I’ll apply it. We don’t have colour – we can’t add blue to create recession – so I use diminishing detail, softening edges, and lighter values that are often lighter than would naturally occur. Ultimately, all that matters is that the drawing is “read” correctly.

Here are two examples within one drawing “Early Morn at Witton Marsh”.
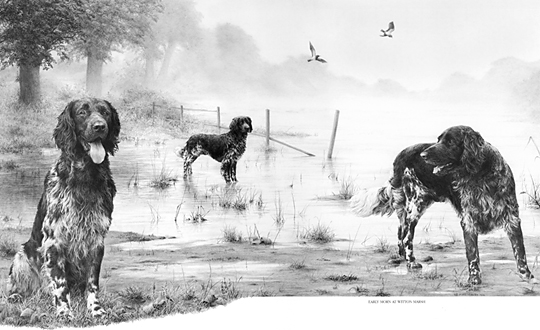
Early Morn at Witton Marsh by Mike Sibley
Early Morn at Witton Marsh

The atmospheric perspective has been stretched to create more recession, and the two birds are deliberately placed to enhance the gap between background and midground – contrasting their relative sharpness against the soft, misty trees and sky.
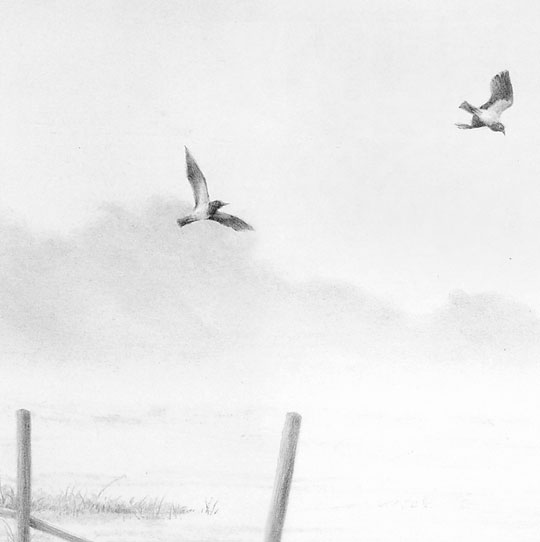
Detail from Early Morn at Witton Marsh by Mike Sibley

Lower down, the central dog is larger than it should be. It was sized for balance and presence rather than natural accuracy. To overcome that, the fence behind it has a false perspective – it recedes more quickly than it should. But it provides scale alongside the dog and then seamlessly connects that to the scale of the brush and trees behind it.
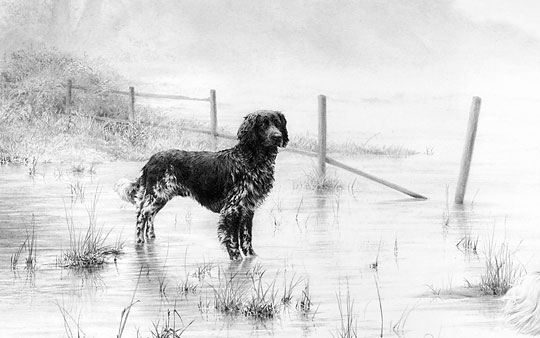
Detail from Early Morn at Witton Marsh by Mike Sibley

And to return to Jay’s original point, all the hair depends entirely on negative drawing – all white hair is purely negative space. The adjacent drawing defines the edge
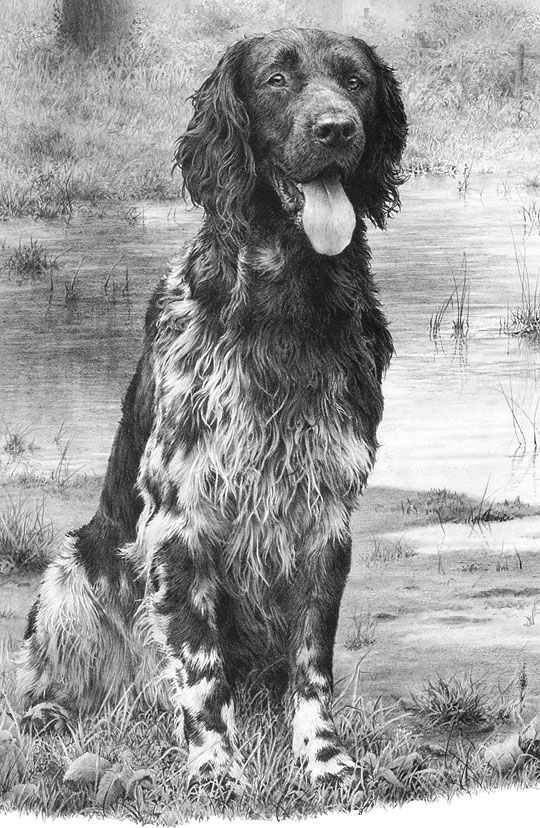
Early Morn at Witton Marsh by Mike Sibley
detail – “Early Morn at Witton Marsh” by Mike Sibley

You can read the story behind this drawing at
https://sibleyfineart.com/gallery_LE.htm?mnst&171–munsterlander

Thanks for your question, Jay.

SAN ANTONIO and LOS ANGELES 2011 Workshops

With only a little over a month before we leave the UK to fly to the US there are still places available in the SAN ANTONIO, TX, and LOS ANGELES, CA, workshops. And, incidentally, in the Yellowstone 6-day workshop too.

The San Antonio and LA workshops are both 3-day, Friday to Sunday events:

San Antonio
     June 3rd to 5th        –    Full workshop details

Los Angeles
     June 24th to 26th    –    Full workshop details

I fervently believe drawing should be FUN! So we run friendly and informal workshops, designed for artists of all abilities. If you have a desire to take your drawing to a new level of realism, these workshops were designed for you!

Over the three days I’ll show you how you can break down any drawing, however complex, into easily manageable parts, and apply simple step-by-step techniques to draw them believably.

You’ll travel from the basics right through to a final drawing, covering a variety of techniques along the way. And no lectures! I prefer to work with you individually as you draw.

All you need do is bring yourself – all paper, pencils and other necessary supplies are included in the cost. And on my website you’ll find lists of local accommodation, travel assistance, Things To Do in the area, and information on the venue itself.

Complete the simple Mailing List box and you’ll receive the Workshop Newsletter to keep you up to date with developments, and I’ll personally warn you when places are beginning to be scarce.

I hope you decide to join us – my wife Jenny and I will love to meet and work with you.

A Very Special Workshop

We fancied doing something SPECIAL as a workshop in 2011. Jacksons Hole was mentioned but the cost was prohibitive and then the idea slowly dawned… let’s go back to YELLOWSTONE! But this time, instead of a 5-day workshop, let’s make it six days, make it affordable, and include everything in the price – that’s:

  • Illustrated talk by a Park Ranger so we know what to expect and look out for during our visit to…
  • A full day in the Park with assistance on photography, taking that unusual but useful shot, and looking for elements that can be combined into a useful setting. And we provide transport and lunch.
  • Improve your photography – late afternoon sessions by talented Artist and Photographer Rich Adams beginning with the basic uses of compact cameras.
  • Visits to the nearby Grizzly & Wolf Discovery Center to get those photographs that eluded you in the Park.
  • Five days of uninterrupted drawing covering drawing from the basics up to advanced.
  • AND all tools and paper will be provided. Just bring yourself.

YELLOWSTONE USA 6-day SPECIAL WORKSHOP

Dates     : 12th -17th June 2011
Duration : 6 days, 10 am to 5 pm
Location : Holiday Inn, West Yellowstone, Montana

Our busy 2008 Yellowstone 5-day workshop

Novice or advanced, you’ll travel from the basics right through to a final drawing, covering a variety of techniques along the way, including the use of references and how to use them for composition, how to use Negative Drawing effectively, and the benefits of seeing and using Negative Space. And no lectures! I prefer to work with you individually so you can learn and explore by drawing.

And I’ll show you how you can break down any drawing, however complex, into easily manageable parts, and apply simple step-by-step techniques to draw them believably.

You’ll learn both the “HOW” and the more important “WHY” – the one that adds understanding to the other. Whatever your present ability, you will leave with a new-found knowledge of how to draw effectively, and how to remove stress from your drawing projects.

WORKSHOP DETAILS

We’re doing everything we can to make this special workshop affordable – including reserving rooms in two hotels to give you a cheaper option. And we scouted for local RV and campsites as well as B&Bs. They’re all listed on my website.

Let’s make this a workshop to remember! Or, as Rich said, something to tell your grandchildren about   🙂

Negative Drawing – part 2

NEGATIVE DRAWING
Negative drawing enables you to perform tasks easily. We previously saw:

  • How we can control separation of background, midground and foreground elements.
  • How we can isolate those areas we don’t yet understand.
  • How Negative Drawing protect our virgin whites.

Negative drawing involves the creation (or isolation) of an element within your drawing by simply drawing around it. To return to our dog example, by completing the background first, you have an established setting in which your dog can exist. Because you are drawing this dog as a part of its world, the two will become unified and possess an enhanced feeling of reality.

RECESSION
Up until now I’ve been referring to background and foreground. But in reality our dog is more likely to be situated in the midground. So by “background” I’m really referring to the major part of the setting – that area BEHIND the dog, and not the foreground, which is on a level with and below the dog.

We will have created enough of the dog’s world to give us an understanding on the environment – a ‘feeling’ for that world. Because we cannot avoid taking that world into account as we draw, the dog will inevitably become a part of it.

In practice, you might choose to partially draw the background to get a feel for it, then to begin drawing the dog, establishing the tones required for the background around its outline. That’s OK if that appears to be the logical way to work.

LOGIC
Logic, as I explained earlier, plays a major role in this way of working. Logic in this case is mainly dictated by understanding. You draw what you understand then, when that understanding wanes, you logically move to another area of understanding. This is difficult to describe but easy to understand in practice.

Let’s take one small area again – the junction of the dog’s coat along its back with the background. If you want that topline to be obvious to the viewer you cannot draw the dog first. Without a background, you have nothing to balance your tones to. So we draw that section of the background first, right down to the dog’s back. There we have two choices – if we fully understand the outline of the dog, we can draw around the hairs along its back, leaving them pristine white. Or we can stop short of the dog and make the junction a job in its own right. This gives you all the control you need. Finally you can concentrate on the dog, engineering the tones used within the coat to make it stand out from the background – to whatever extent you wish. It’s a logical progression that puts you in control.

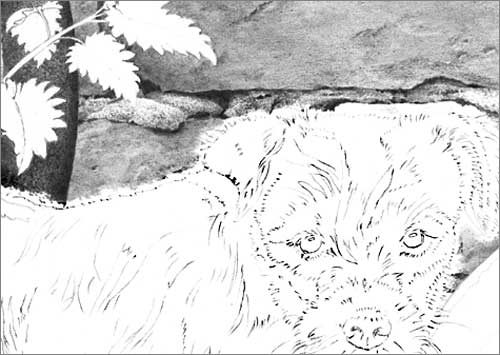
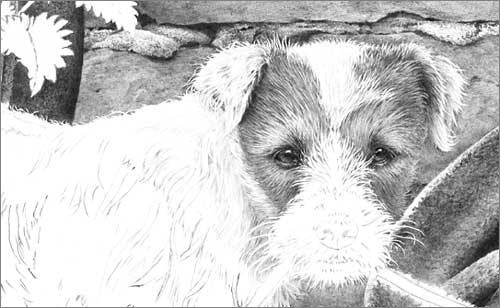
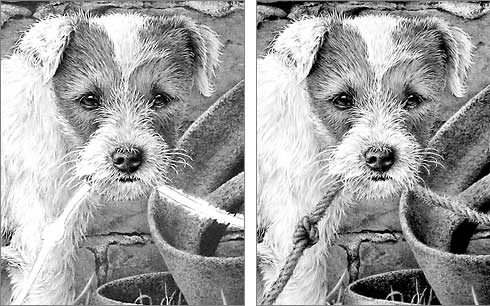
Below you will see that I drew the brickwork down to but short of the dog’s back. Why? Because I was immersed in brick, not hair. Now I can concentrate on defining the dog’s outline while blending new drawing back up into the brickwork – I’m thinking “hair”, not “brick”.

Detail from Parson Russell terrier pup study 'What?'
Brickwork stopped short of dog. Now I can concentrate on defining the dog’s outline while blending new drawing back up into the brickwork. I was thinking “brick”, now I’m thinking “hair”.

Note that I didn’t attempt to draw the dog while defining its outline. My concentration was purely on the creation of the hairs around its extremity.

CONCENTRATION
A drawing, any drawing, can be broken down and simplified in this way. If you’re drawing the wooden side of a barn, just draw wood. If grass overlaps it at the base, draw around it. You’re drawing wood – your concentration is on wood – you’re living wood! And, as a bonus, when you begin to draw grass, you’ll have full control over those negatively drawn stalks that overlap the barn door, so you can highlight them, push them into shade, or make them as dominant or subtle as you wish.

WHICH IS DOMINANT?
Where any two textures meet, ask yourself which is dominant. Which will logically control the tones of the other. If we draw the grass first, the tones used within the blades will control and limit the tones available for our barn door. If we draw the barn door first, its tonal values will control those available for the grass. Which is logically dominant from the point of view of physically drawing them? Which is easier to engineer to overcome the limitation imposed by the other? No contest, in my mind, the barn door wins on all counts. It’s so much easier to engineer the blades of grass to stand out from, or blend into, the barn door.

As a bonus, Negative Drawing prevents you from polluting the virgin white within your drawing. Erasing graphite from a spot that should be a pristine white highlight will rarely achieve a good result.

Negative Drawing – part 1

Negative drawing involves the creation of a element within your drawing by simply drawing around it. If, for example, you’re drawing a dog, it is often logical to draw the background first. This presents two benefits: you have an established setting in which you dog can live, so they will possess a unity; and you have full control over the dominance of the dog (the way it stands out, or blends in, to the background).

Logic plays a major role in this way of working. Let’s take our dog again. Because it is the main element, the focus of the drawing, we have a natural inclination to work on that first. But how light or dark should it be? Where is the light source positioned, and what sources of reflected light are present?

Now turn the strategy on its head. Consider drawing the secondary elements first. You should have a mental picture of what you want to achieve with the dog so, keeping that in mind, we have a logical starting point for the background. With the background completed we now have a setting in which our white silhouette of a dog exists. We have a feel for its environment. We know if the ambient lighting is harsh or diffused. We know what might overlap it, such as stems of grass or weeds, and how they fit naturally into the overall setting. So we now have full control over the separation of the subject from the background.

Let’s take one small area – the junction of the dog’s coat along its back with the background. If you draw the dog first, how dark do those hairs along the extremity need to be? Draw the background first, and draw around those hairs along its back and you have all the control you need. As you gently add tone and form to those hairs, you have the background to refer to at all times.

That single example has covered the three major benefits of using Negative drawing:

  • Offers control by separating the background, midground and foreground elements.
  • Isolates the unknown.
  • Protects virgin whites.
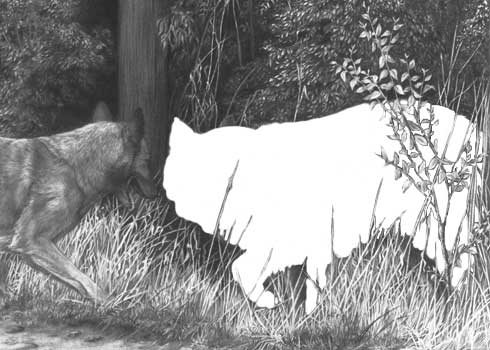
Background drawn before dog to allow maximum control when drawing dog.
Taken to extremes but this is a recreation of an actual event.

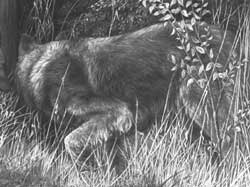
Section of finished drawing.
If those are the ‘rules’ then logic overrules them. In practice you draw until understanding ceases then you move to another area you do understand. As you draw, each area will suggest the treatment of the content of those surrounding it. Eventually, your drawing will expand to meet that unknown area. Now surrounded by enlightened drawing, you will gain a greater understanding of what that area requires. So, when I mentioned “completing the background first” that is not necessarily to be taken as the full truth! In reality I will work the background in stages around the dog, and I may (though not often) draw the adjoining portion of the dog too, but the order is always background first then dog.

DRAWING WITH UNDERSTANDING
To draw effectively, you must fully understand the area you are working on. You must be able to experience it in three-dimensions, to feel its texture, and to know how it relates to surrounding areas. We’re not copying source photos but creating our own world in which all elements must co-exist. If you have first established the background, the environment, then you have a world in which you can create your main subject. This assists your understanding of the subject as an overall element.

However, within that element other similar problems will occur, which can be solved using the same strategy. Perhaps you have a problem understanding the way the rear of the belly and rib cage meet the shoulder of the rear leg? Leave it. Draw the rear leg first and understanding will be clarified, so you can confidently draw the belly up to that previously ‘unknown’ junction.

In the meantime, you haven’t polluted the virgin white of that belly area with trials and test of possible tones. In my opinion the freshest, sharpest and most effective drawing is created with the first attempt. If instead you try out ideas within that area, perhaps by adding layers of tone in an attempt to understand the shaping, you will simply muddy the final result. Consider that a soft grade of graphite often will not layer to its full potential on top of a harder grade, because there is insufficient tooth to hold it, and you’ll see that your initial trials have greatly reduced the options open to you.

Keeping control of the drawing of the rope
Keeping control of the drawing of the rope by establishing the background first