Jackie emailed to tell me she was enjoying my book and that she loves to draw wildlife and horses. She asked…
“When drawing the horse that has fine “show coat” hair, would I just use a blending technique or actually try to draw smooth, short hair?”
Definitely not blending! If I’m correctly picturing the type of coat you mean (smooth, glossy, with sharp–edged highlights) the last thing you want to so is soften anything. Personally, I’d build it up using short adjacent marks that allowed me to “sculpt” the form as I progressed through the horse. And I’d be aiming at producing sharp edges.
“Also in drawing a cougar, would you consider the hair to be short? My try at this looks like I am just drawing hairs. I have tried not to, but it just keeps looking that way, especially when the face does not have long flowing hair, but short hair. I’m used to working in oils and watercolour.”
When drawing hair, think of it terms of watercolour and not oils. With oils you have the opportunity to add highlights. However, with watercolours and graphite the only white we have is the paper, so you need to work in reverse. Don’t think of it as drawing hairs – instead draw the shadows between the hairs. That takes practice but it really is the perfect solution. Pencil marks very rarely represent hairs themselves – except when a black hair overlaps an area of white hair.
Take a close look at hair and ask yourself “If I ignore the colour, why can I see individual hairs?” It’s because each hair, or lock of hairs, is defined by the shadows either side of it. And its three-dimensional form is displayed by the highlights it contains. So think of drawing a hair in three stages:
• 1. define its edges by using the surrounding shadow.
• 2. give three-dimensional shaping to the, currently white, hair working towards but avoiding any central highlight.
• 3. tone down the highlight if required.
That way you preserve the pristine white of your paper at each stage and, when you do add graphite to an enclosed area it will be surrounded by completed drawing that will help you to perfectly judge the values required.
This Westie takes that method to its extremes but it clearly illustrates the point:
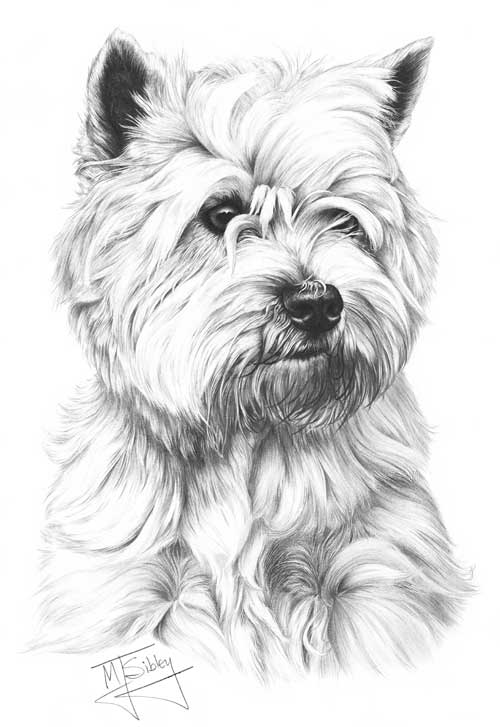
With the sole exception of the wet hairs around the mouth, all hairs are defined only by the shadows around them.
And these two drawing (both 3″ x 2″ / 75 x 50mm) show the method in a more common application.
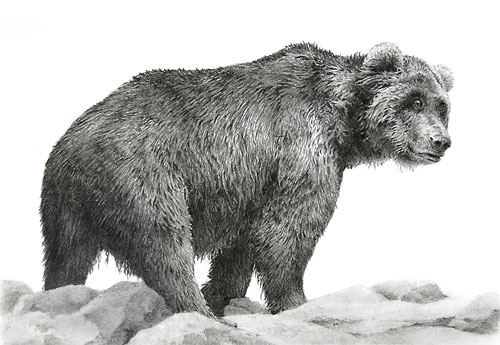
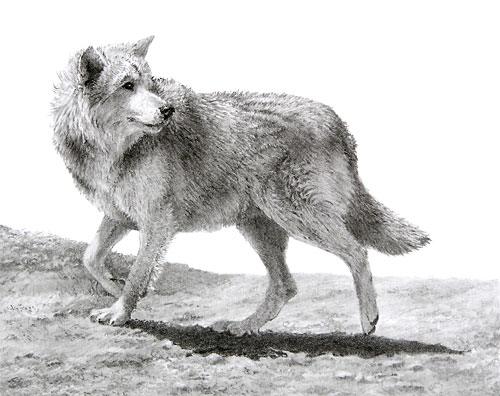
In both cases, “hairs” do not exist at all, only the shadows between hairs. The negative “hairs” that result are then toned down, with reference to the lighting direction, to match their global positions within the three-dimensional form.
And even Tom’s dark winter coat employs the same negative drawing method.
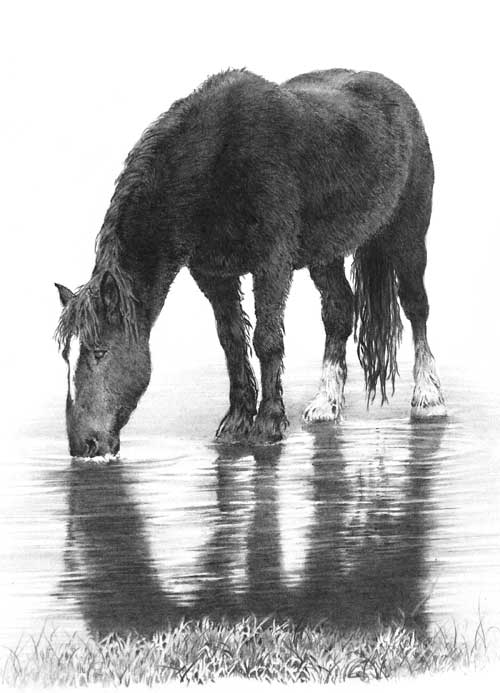
You can see in this 6″ x 4″ (150 x 100mm) study that exactly the same negative drawing method used for Tom’s white rear fetlocks has been used throughout the body and head… and even the grass.
You can read more about Negative Drawing on this blog, and my website also has Negative Drawing tutorials on Drawing Grass and Drawing Hair.
You can view Jackie’s work here: www.JacquelineEngland.com