Molly emailed to ask…
I sent you a few of my pet portraits a few years ago and you were kind enough to give me a free critique. I purchased your book and have studied it, but still am struggling with my drawings. I was wondering if you would have the time to give me a quick critique on my more recent drawings so I can see how I have improved.
I would like to attend your workshop in Yellowstone, hopefully it will work out for me to attend this year.
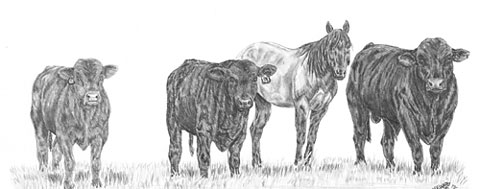
You sent me five images, Molly, but I’m going to concentrate on just one, because I think they all contain the same approach.

You’ve developed a good eye, Molly, and you show a good understanding of what you are attempting to draw. The Rottweiler’s nose, for example, is perfectly shaped – and you’ve certainly captured the character of this lovely dog!
However (you could see that coming, couldn’t you 🙂 ), I think you’re too focussed on the reference, and drawing without really being aware of the three-dimensional shape that you’re depicting. You are very accurate with the growth direction of the hair but reacting, I think, to the tones you see before you without asking yourself what they represent. You’re drawing the two-dimensional content very well, but losing sight of the three-dimensionality – and the finer detail that adds that sense of reality.
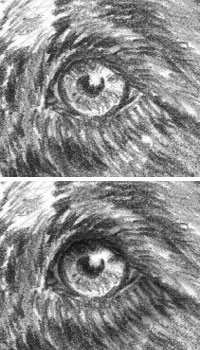
Decide on a lighting direction before you begin. It doesn’t have to be the same one as seen in your reference – in fact, it will benefit you if it is different, because when you are forced to impose your own lighting, you HAVE to understand each element in three-dimensions. It’s this lack of three-dimensional lighting that is making your drawings appear to be flat – as is your shyness in using bold blacks.
For example, you’ve used good solid blacks for the pupils, but then not used them in the shadow beneath the top eyelid. As a result the eyeball and lid appear to be on the same plane. Think about where the structure you’re drawing recedes or protrudes and then light it accordingly. With a little practice you can then begin to manipulate elements of your drawing to bring out or emphasise the three-dimensional nature. I would, for example, be planning to introduce deep shade between the ear and head so the difference in planes was obvious. And I’d darken the neck beneath the chin too for the same reason.
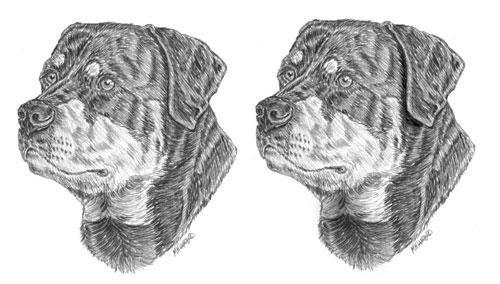
The ear now stands proud of the face and adds a definite three-dimensional sense for the viewer. Never be afraid of going dark – you can always later reduce the intensity of the tone with Blu-Tack or similar.
Now you are much more comfortable with your pencils begin to look deeper into the reference. Understand the exact make-up in greater detail and then build that into your work. The Rottie’s nose, for instance, looks good but in reality it has a leathery texture of pits and islands. You have a good idea of its construction – now slow down, focus more on that single element and add the texture. Treat it as a drawing in its own right so you’re not tempted to move on to other areas too quickly.
You’re definitely heading in the right direction! I do hope you can make it to the Yellowstone workshop in June. There’s so much I can show you more easily – and I can look over your shoulder too 🙂

