Using copyright photographs?

How do I avoid using copyrighted photos?

Elizabeth asked:

“Do you take your own photos and draw from them? Do you draw from uncopyrighted materials? Or is it entirely from your head? I draw a little, and it’s mostly from horse encyclopedias, old calendars, and free (or not-so-free) stock photos I’ve found on the internet; most pictures I take myself I get frustrated with, but if I want to make any money off of it I can’t legally use someone else’s photography. So I was curious to know how you handled it.”

First, let’s simplify the copyright issue: Unless the originator of your photograph has given permission for it to be used, you are infringing the copyright by copying it – with or without modification. On the other hand, reference photos from a book, the Internet, or any other such source, can be used to provide information and inspiration. Use of such “borrowed” images is perfectly legal if your intention is solely to gain an understanding of, for example, the growth pattern of hair on a bear, the characteristic shape of a particular species of tree, or the texture of a hand-made brick.

If you copy copyright material for your own enjoyment or education, I doubt many photographers will object – but you should always ask first. However, if you use the image for a commercial purpose you’d better be well insured. Like you, the photographer’s income probably comes from his or her work – put yourself in the photographer’s shoes… would you permit it?

When I first began drawing seriously I ran into the same problem that you’re experiencing. Now I always work from my own photos. But I’ve also learned to do without them. I’ll explain…

In the early days I became fixated on detail. I actually believe this is a necessary stage of development that eventually leads to the skill of making rational decisions about what is important to the study and what should be discarded.

I’ve also found that the very best results come not from faithfully reproducing a reference photo but from studying it until I’ve formed a mental three-dimensional image – it’s that image I draw and not the original 2D photographic one.

Photographs are still important suppliers of detail or overall feelings for a subject or texture. For example, when I draw trees, I surround my drawing with suitable photos. A few may provide actual details, some supply a feeling for the textures and internal forms, and all remind me of what I already know.

Once you free yourself from actually copying reference photos you can use whatever you like – book illustrations, stock photos, real life, sketches – because the result takes a little from each but is undeniably YOURS. And that freedom presents one additional bonus – the reliance on memory increases your ability to see and recall everything around you.

The ability to “experience” whatever you are drawing is something I try to teach in my workshops. Once you are physically “living” within the art you are creating, memory, emotion and interpretation are of prime importance and not references.
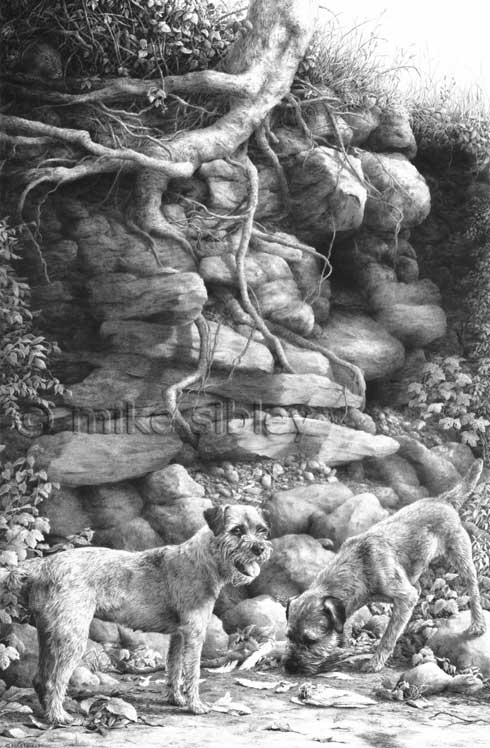
'Overlooked!' by Mike Sibley

For example, my “Overlooked!” drawing is based on photos that I personally took of Border Terriers – I had perhaps 180 of them, supplying every detail and breed characteristic that I needed.
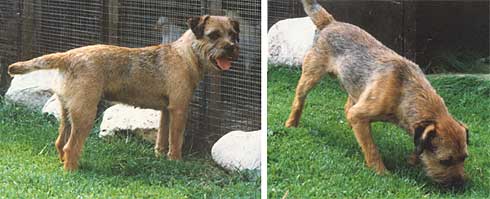
The Border Terriers used

I had one other single photo – the one that gave rise to the idea – of a tree growing on top of a low bank. The soil had slipped and its roots were fully exposed on one side.
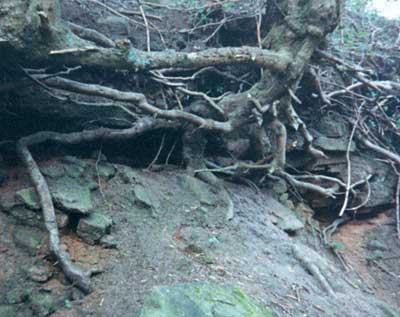
Inspiration for the composition

And many years earlier I had photographed a pet wild rabbit (rescued from a hay baler). Those were my references – everything else is entirely imaginary.
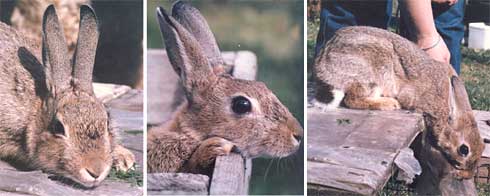
Pet wild rabbit photos

Even though the dogs are fairly accurately reproduced from the photos, each part was carefully studied, understood and my mental interpretation drawn.

So, my advice is to gradually cease using photos as the prime source of information. Whenever possible, take your own photos and take MANY. The first shot may be the one you want to use but then zoom in and take more of the detail. Move your position and take more from differing angles – take enough and you’ll be able to pick the subject up as you draw and turn it around to study it from all sides. Many 2D photos will help build a 3D image in your mind. Aim to increase your understanding of the subject and not just to capture its basic image.

You don’t say why you become frustrated with your own photographs. In my case, I’m not a natural photographer and constantly make basic errors. However, if it suits my composition, I can quite readily work from an out-of-focus photograph, because I can rebuild it using detail from all the others I took. If your photos are too dark, load them into Photoshop, or a similar program, and use the Levels facility to display all the previously obscured detail. But that’s a subject to discus on another day…. 🙂
Fixatives for pencil drawings

A reader wrote to me a week ago (apologies for the delay) and asked:

What exactly is a fixative for pencil/graphite drawings? How and why should it be used? Is there a special kind?

There definitely is a special kind! So forget the use of hairspray as championed by a few artists. Why use a product designed for gluing hair together, with its unknown future problems, when you can use a product carefully formulated by scientists for just the purpose in hand.

I am by no means an expert on this matter but I do always use a fixative on my drawing on completion. In my case I use Winsor & Newton’s “Fixative for Pastel, Charcoal and Pencil”.

A good fixative not only fixes the loose graphite to the paper to prevent smudging, it also contains a UV filter to help to prevent yellowing (or aging) of the paper by sunlight.

I would always recommend its use…

…and here’s how…

    * Place scrap paper at either side of your drawing
    * Spray on one sheet until you are certain it won’t spit
    * Pass the spray across your drawing
    * Repeat in the other direction.
    * Many light coats are better than one heavy coat.

The most immediate effect is that the sheen will disappear from the drawing and your blacks and darks will noticeably deepen in tone. They are not actually altered but just retuned to what they should have looked like had the flat plate-like graphite grains not reflected stray light.

Mounted or Unmounted paper?

Michael Benee wrote to ask:

“I have just finished my first dog portrait, and I mounted the cartridge paper onto a mounting board before I started. I notice that you use a heavy weight Mellotex paper is this so that there is no need for mounting, and is this how you supply your originals to your clients i.e.unmounted?”

You don’t say how you mounted your drawing paper to the stiffer support. I’d recommend vacuum mounting by your local framer, because other methods (spray adhesives, for example) may not be permanent or may bleed through to the surface with time.

I don’t ever mount my drawing paper mainly because I detest any “bounce” in the paper as I’m drawing. A smooth and hard surface beneath my Mellotex means that the mark I make is the mark as I intended it – not one that sinks into a soft surface that interferes with my control. If your paper is lightweight, change to a heavier weight and place it on a melamine or similarly hard surface, such as a drawing board. Even tabletop drawing boards usually possess such a surface.

Another reason why I don’t mount my paper is that most of my work is destined to be released as limited edition prints. That means it has to be scanned and, in my opinion, you can’t beat a laser drum scanner, which demands that the paper be sufficiently flexible to wrap around the scanner’s drum.

When (rarely these days) I present a commissioned original to my client it is always in its raw state – trimmed to a suitable size and displayed in a custom-made matboard folder. The folder protects the drawing and doubles as a presentation easel, further protecting the drawing from being handled.

Michael added:

“Please find enclosed a pic of my first attempt at drawing my dog, any comments would be welcomed with open arms”

Copper by Michael Benee

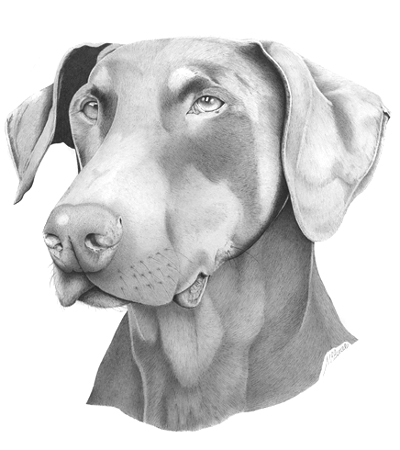
For a first attempt (even for a tenth) this is admirable! Weimaraners suit graphite so well. The eyes are beautifully studied and executed and sufficient directional facial hair suggests the texture. My only criticisms are that the texture does not extend to the muzzle, which appears to be too smooth; that the dog overall is too tidy (it’s the out of place hairs, flecks of foam etc that add a sense of reality); and the nose has a highlight suggesting a shine, although Weimaraners have quite a dry, non-reflective nose.

Finally, just a personal preference, I would have feathered the bottom edge of the neck to suggest an unseen continuation.

That said, well done!

Drawing Paper Repairs

REPAIRING DAMAGED DRAWING PAPER

Kerri Higgins (www.ArtWanted.com) asked me this morning:

I have done the unthinkable on one of my favourite artpieces rendered with colored pencil and light watercolor wash. It is still not right and I need to fix it, why oh why did I screw around with it! Is there a way to cover damaged final drawing paper?

Well, Kerri, I wish I had the answer for you but I probably don’t. It’s the sort of problem that only arises once, because after that first time you take the utmost care to ensure you don’t do it again! I know – I’ve been there.

In my case I have an early drawing and print of a Rough Collie head-study. I was unhappy with the highlight in the eye and, like you, I changed it once too often. This was almost thirty years ago when erasers were not as developed as they are now, so my final “improvement” was carried out with a sharpened typewriter correction pencil. Well you guessed – I rubbed a hole right through the paper!

I didn’t know how to repair it but typewriter correction fluid seemed like a good idea. It did fill the hole… but it dried with a greenish colour-cast, quite different from the white of my paper.

As I said, you only ever make that mistake once!

You didn’t fully explain what your problem is, so I’m assuming it’s not a hole but an area of raised fibres, where you’ve broken through the top surface. Nor did you tell me what paper you were working on. Paper, incidentally, is not nearly the flimsy material that many artists believe – particularly the Mellotex that I draw on – but repairs are best left to professional Paper Conservators, who are not necessarily as expensive as you might think.

In the case of raised fibres or removal of the paper surface caused by excessive erasing, there is nothing that you can do to restore the original condition. If you attempt a repair, dry media, such as your coloured pencils or my graphite, will sit awkwardly in the fibres of the paper and will be visibly different as the viewing angle of the repair changes. In the case of graphite, the overall sheen will alter too, due to the broken surface reflecting light haphazardly.

An attempted repair to a watercolour work might be even more disastrous, because the openness of the paper’s surface in the damaged area will cause it to wick any wet medium into the paper with alarming consequences.

There is, however, one solution that you might try if the surface is only suffering from raised fibres – it’s one I’ve used myself with some success in localised areas. Take a fingernail emery board, stroke it lightly along the area, following the grain of the paper, to realign the fibres, and then simply use the back of one your fingernails to smooth the fibres back down. If you wish to draw within that area again, do so only in the direction of the grain. It’s not perfect but it does work.

Human Portraiture

There is a small Yahoo! group of artists that I belong to, run by Diane Wright (www.DianeWrightFineArt.com), called “Drawing Line to Life”. Diane started the group to study my book of the same title.

Over the last few months Diane has started to review the book again, and we have reached Chapter 8 – where I demonstrate drawing my granddaughter Charlotte – and she has decided to expand the topic to encompass human portraiture.

This is such a big topic that it will be broken down into smaller segments. As we finish up on our first topic, eyes, Diane thought it might be beneficial to layout the schedule for the next few weeks, and we would like to welcome anyone interested in exploring the topic of drawing human portraiture to join us in our discussions, step-by-steps, and sharing of our progress.

  • Feb 1-13 Eyes
  • Feb 14-27 Nose
  • Feb 28 – Mar 13 Mouth
  • Mar 14-27 Ears
  • Mar 28 – Apr 10 Hair
  • Apr 11-24 Head
  • Apr 25 – May 8 Hands
  • May 9-22 Clothed Figure Drawing

Neither I or Diane are portrait artists, but we’re using this opportunity to stretch our skills and pass on what we do know. We hope you will join us in this journey into human portraits. After we have exhausted this segment on portraiture, we will resume our study of my book with Chapter 9.

I would like to invite you to join us…….
http://groups.yahoo.com/group/DrawingLinetoLife/