Tips & Techniques
DRAWING GRASS - an introduction to "Negative" drawing
The title of this article is really too specific as the techniques described here apply as much to the drawing of hair as to grass. This is also an introduction to the use of "negative" drawing - drawing around white space, which only exists in your mind until you surround it with positive marks. I will cover "negative drawing" in more detail in a later article.
So what is Negative Drawing?
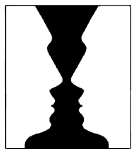 What do you see when you look at this picture on the right? Do you see an ancient black drinking cup? Maybe an ebony candlestick holder? These are the positive images. Or do you see two white faces both looking at each other? Think of these faces as the negative areas or what I call "White Space". Imagine yourself "seeing" these two faces on a white sheet of paper and then filling in the space between them in black so the faces are revealed. This is Negative drawing - seeing the space and not the line. Teaching yourself to see White Space is one of the best lessons you will ever learn.
DRAWING GRASS
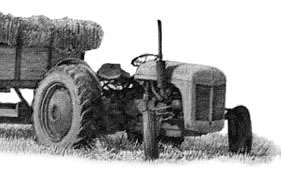 You can of course draw grass in any way you choose from "sketchy" (which serves its purpose here as this drawing is just 1½" high and the grass exists only to place the tractor in space)...
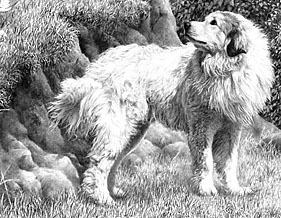
...to where it plays a full role as an integral part of the "reality" of the drawing.
In both cases the technique is much the same. The trick is to "think grass" and to work just fast enough to... Well, let me explain —
SPEED FOOLS THE BRAIN
It confuses the rational element that tries to control the creative side. Let your subconscious work, it always knows best. Consider the following two examples which, I think, prove the point."The coconut shy principle"
Pick up a ball, quickly turn around and throw it at a target the instant you see it. You will hit it nine times out of ten. Pick up the ball again, this time facing the target, take aim, compute initial speed of ejection required against the arc of decreasing velocity, include wind factors, the placement of your feet and resulting balance, the angle of your body to the target, equate these to your known muscular power, let fly...and miss!"The parking principle"
Try slowly and carefully reversing a car into a tight parking space and you will often fail. Try it at speed (just slightly faster than your thinking process can function) and you will usually achieve success first time. I learnt this trick in my taxi driving days - it requires practice leading to confidence and, if you try it, don't send me your repair bills!In both principles, failure arises from letting your conscious mind dictate your actions, and success comes from allowing your natural intuition to rule. In other words, you're trying too hard - just let it flow. The beauty of working in graphite is that you have a near-perfect mind-to-hand-to-image contact. Don't let your conscious mind interfere — you think, you draw, it becomes reality - in one unbroken and continuous process.
So how do we translate this into grass (or hair)?
DASH & REHASH v SLOW 'N STEADY
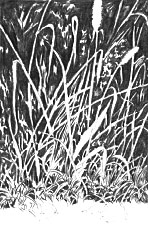
 I have two basic ways of working - both equally justifiable - "dash and rehash" and "slow 'n steady". The first often works well and it's the one I recommend for drawing grass - it contains an element of spontaneity and some surprising results can emerge. It's quick, it's immediate and requires only a little, if any, retouching (the "rehash" element). We'll come back to "Slow 'n Steady" later and then combine the two.
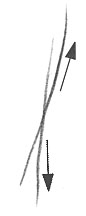
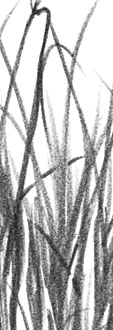
Imagine that there are only two marks that we can make: one upwards and one down. I'm going to use the upwards stroke to "draw" the stalks that spring up from the base of a clump of grass. The downward stroke is going to taper off and define the tops of the stalks in the clump below the one I'm drawing. The upward stroke draws a positive mark, the downstroke draws in negative.
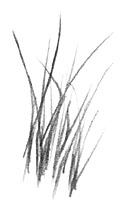
Working quickly, more strokes have been added...

...the area is expanded...
(the box encloses the previous image)
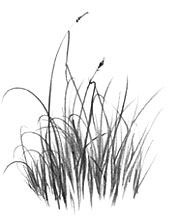
...then I draw back down into the base to further define the white spaces.
Below, the process is repeated - positive strokes
at the base draw into the negative shapes above and begin to define new white spaces below...
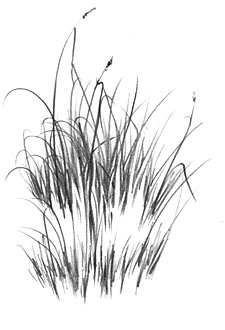
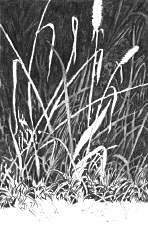
A degree of work in the central section blends the two together and a small amount of tone is being added to give body to the negatively drawn grass.
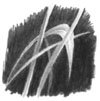
Note the occasional positive stroke that lies "behind" the negative stalks, throwing them forward...
...and in front to add depth.
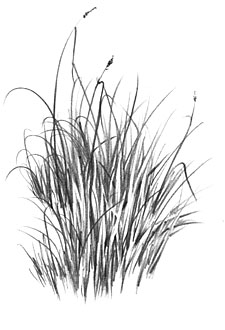
For clarity I've drawn these examples far larger than I would in normal use. Here you see an advanced version of the technique as I usually apply it.
Try this exercise to develop your "Negative Drawing" skills (don't draw guide lines!):

Picture a few white stalks on your white paper and define one space...

...fill in more spaces...

...and more...
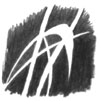
...until you've defined all the white space...
...then add tone to fix the spatial relationships between them all.
Picture a few white stalks on your white paper and define one space...
...fill in more spaces...
...and more...
...until you've defined all the white space...
...then add tone to fix the spatial relationships between them all.
SLOW 'N STEADY incorporating DASH & REHASH
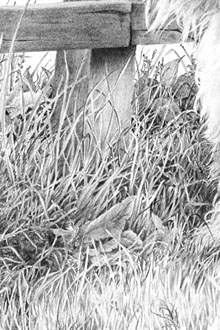
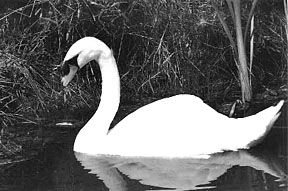 I have my friend Murray Cholowsky to thank for the photo as it represents his latest challenge and it was he who asked me how I might tackle the grass.
Consider that the grass here is in two planes — the prominent foreground stalks that tell the eye "this is grass" and, behind, a less distinct plane that the eye cannot make real sense of but it knows it's grass because the front plane gives it the clues that it craves. It's a greedy animal is the brain - always wanting to make sense of everything it sees! So we'll help it out a bit. Let's start with the front plane...
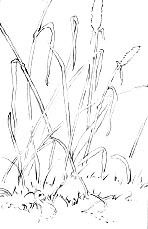 Here I would begin by mapping out the main stalks; lightly drawing a line either side to delineate the space that constitutes the stalk and leaf. Remember that you are defining white space so be aware that it is the inside edge of your line that counts - you are drawing that line around a white shape. There is only one important consideration here - what you start you must finish. Every stalk you draw must have a beginning and an end - it must go somewhere. The eye is adept at noticing elements that it cannot understand and will be "stopped" by that element in passing - distracting the viewer and damaging the sense of reality you are trying to achieve.
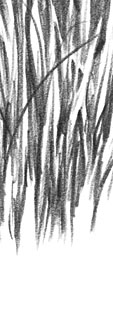
 Having defined the main stalks (I call them "status" stalks - they're food for the brain) using the "Slow 'n Steady" approach, I'll switch to a more spontaneous style of working to draw the less distinct grass on the rear-most plane. Here is where you let your imagination go free, working at a pace that prevents conscious intervention. Your aim is "natural" so let Nature take over - you are, after all, one of Nature's children. And Nature knows all about balance - you will find yourself introducing stalks here and there that may even surprise you with their placement. Don't be tempted to intervene, just let Nature take over. And don't touch those "status" stalks - you cannot properly define their tonal values until you have completed the grass behind them.
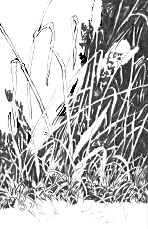
 As you work on this secondary area between the established white spaces that represent the status stalks of grass, introduce random shapes and lines. As long as these vaguely follow the rules of natural grass and foliage, they will serve to fool the brain into seeing more detail than exists. In life you could not distinguish every element in such an arrangement (especially in areas of deep shade) so you should not be able to do so here either.
 Now picture, really picture, yourself looking into that area and begin to add reality to the situation; toning some stalks down a little and others so much that they are barely discernible. Just so in Nature - not everything is seen with total clarity. If you can see the reality in your mind you will achieve a sense of reality in your drawing.
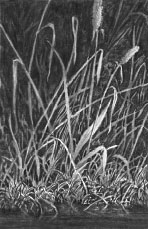 With the background completed, the status stalks are given body, adjusting the tone of those behind them if required.
Finally, the foreground water and reflections are established.
By working forwards, full control was permitted over each stage. Each blade could be pushed back into the shade or brought forward into the light, because the area behind it existed.
It may assist you to know that this small drawing measures 5×8cm (2"×3") and took approximately 1½ hours to complete.
More uses for these techniques
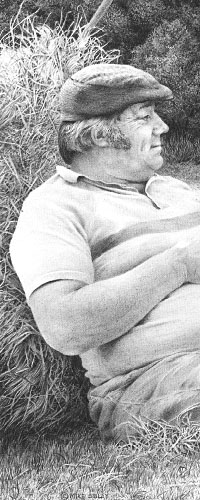
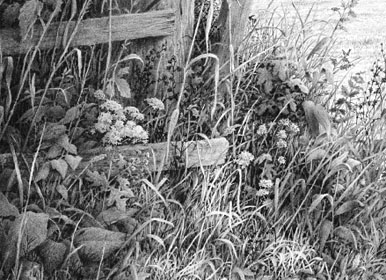
Hay bale and grass...
brambles and roots...
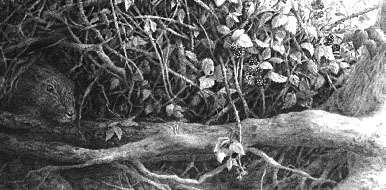
and foliage and weeds
and foliage and weeds
TOP TIP
Never throw work away! No matter what your opinion of it might be right now. In the years to come, when you're feeling despondent that you are no longer improving at the rate you once did or you begin to think you will never attain the level you set out to achieve - take a look at your early work and see just how far you have come!
Available here...

320gsm super-smooth Brilliant White paper
The ultimate versatile kneadable eraser
288 pages of drawing techniques and more...

Pencils, Starter Packs and accessories...
320gsm super-smooth Brilliant White paper
The ultimate versatile kneadable eraser
288 pages of drawing techniques and more...
Pencils, Starter Packs and accessories...
